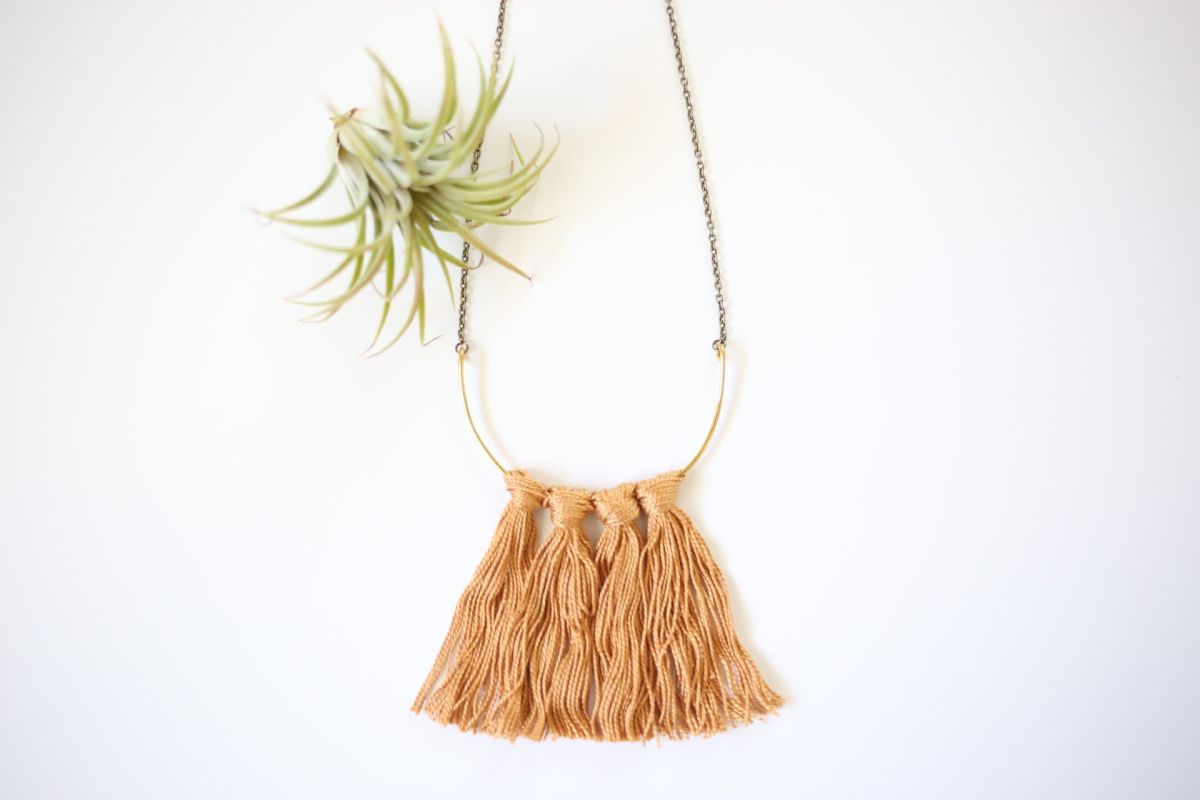
DIY Fringe Brass Necklace - Step By Step Craft Tutorial
Flowy fringe is in style, and we got you a fun and like shooting fish in a barrel project thats perfect if you love bold jewelry and cobweb. In a couple minutes you can make yourself a beautiful flowy slice to habiliment effectually your neck and add some spice to your outfit.
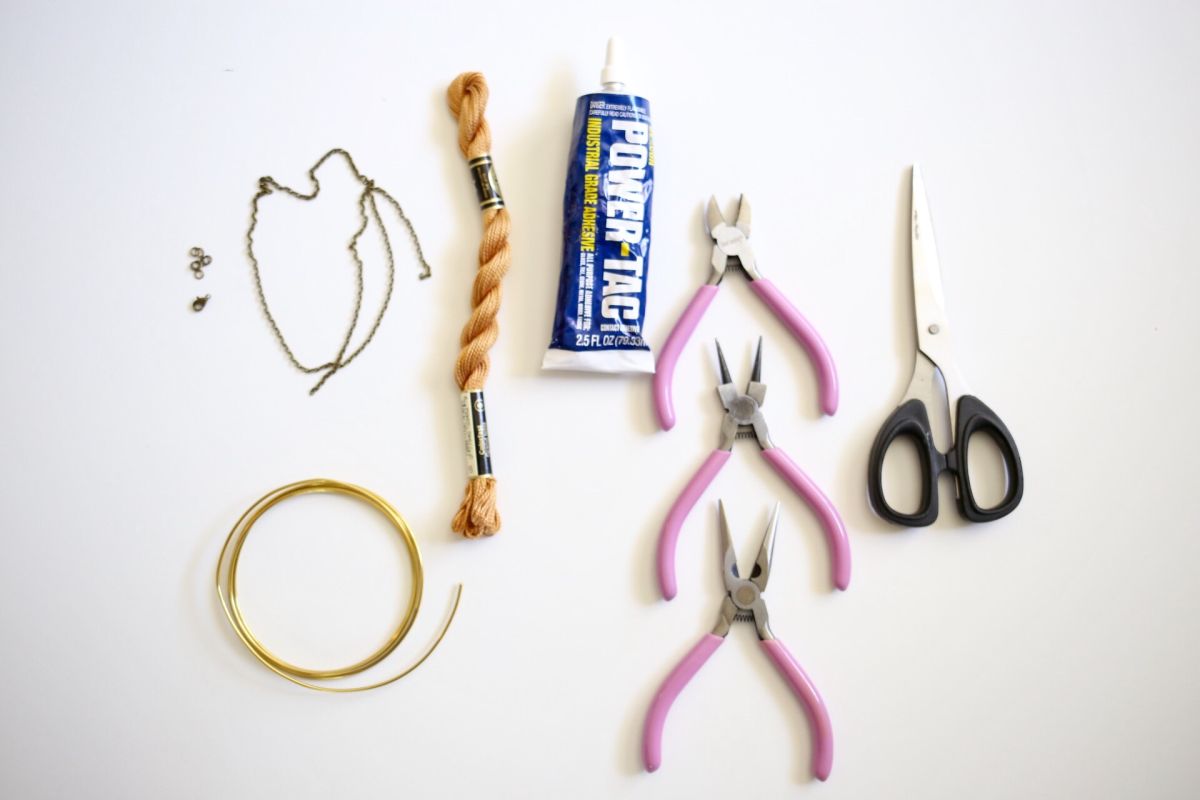
Materials yous will demand to craft the fringe contumely necklace:
- Pearl cotton fiber thread
- 18 guess brass wire
- Ultimate adhesive or glue gun
- 4 Jump rings
- Jewelry clasp
- Jewelry chain
- Measuring stick
- Scissors
- Jewelry pliers, cutters, round olfactory organ pliers
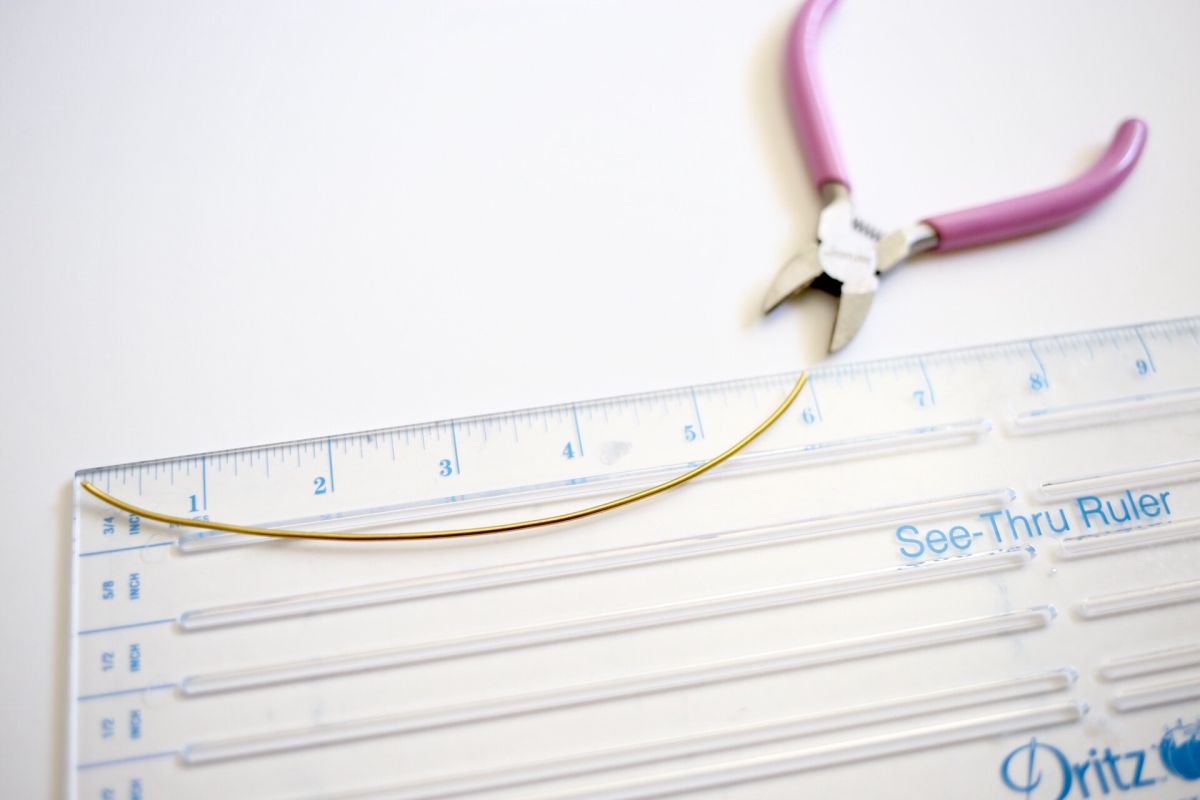
Step 1: brass cutting
Take the brass wire and cutting vi inches with your jewelry cutter.
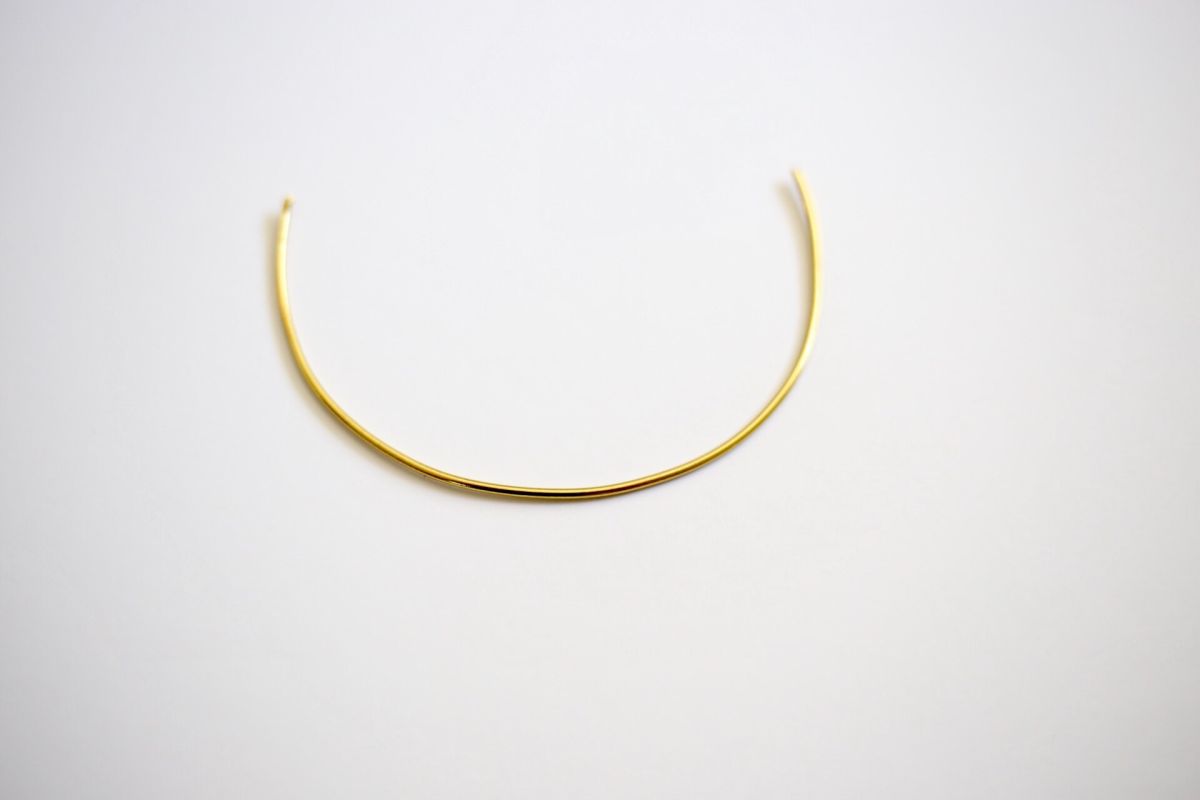
Step 2: mold brass
With your hands mold the brass wire into a semi-circle. If you demand help molding the wire y'all can wrap it on something round, similar a jar or a tin can.
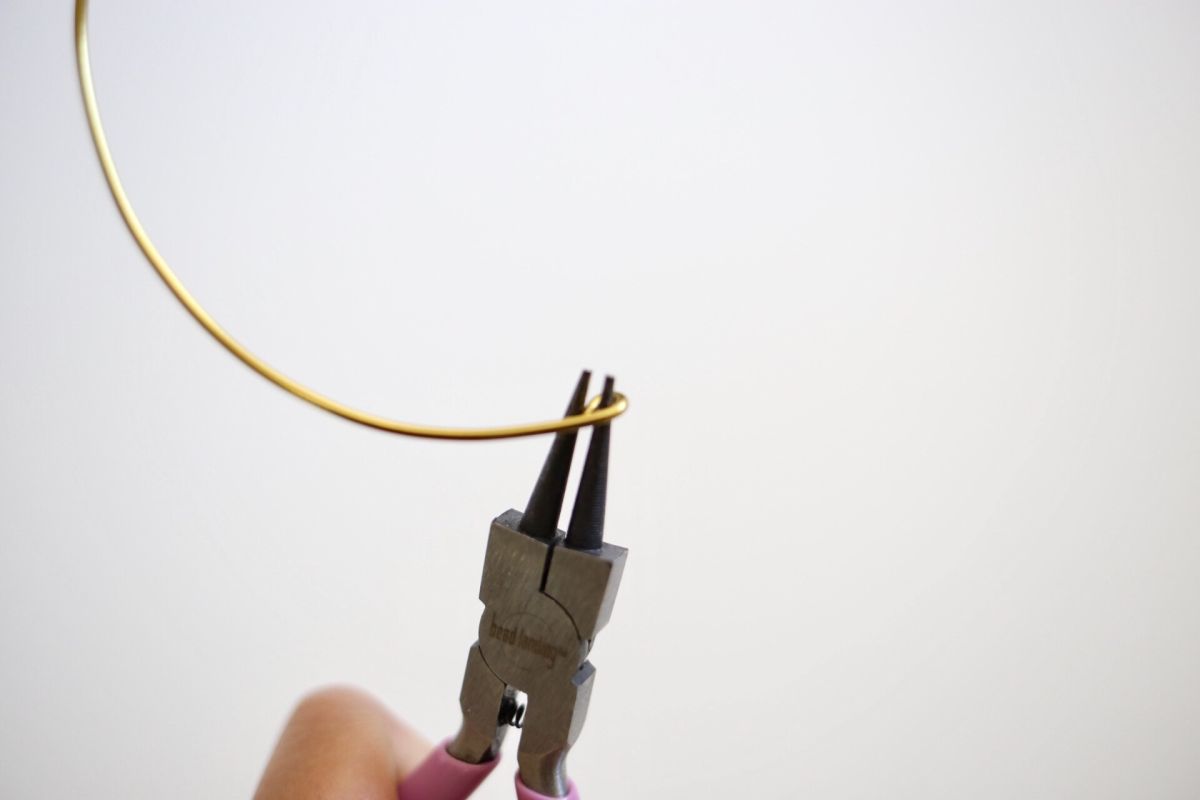
Step iii: use the piler carefully
Using the round olfactory organ plier, create a loop on both ends of the wire- advisedly wrap the ends around the tip/center of the round nose plier.
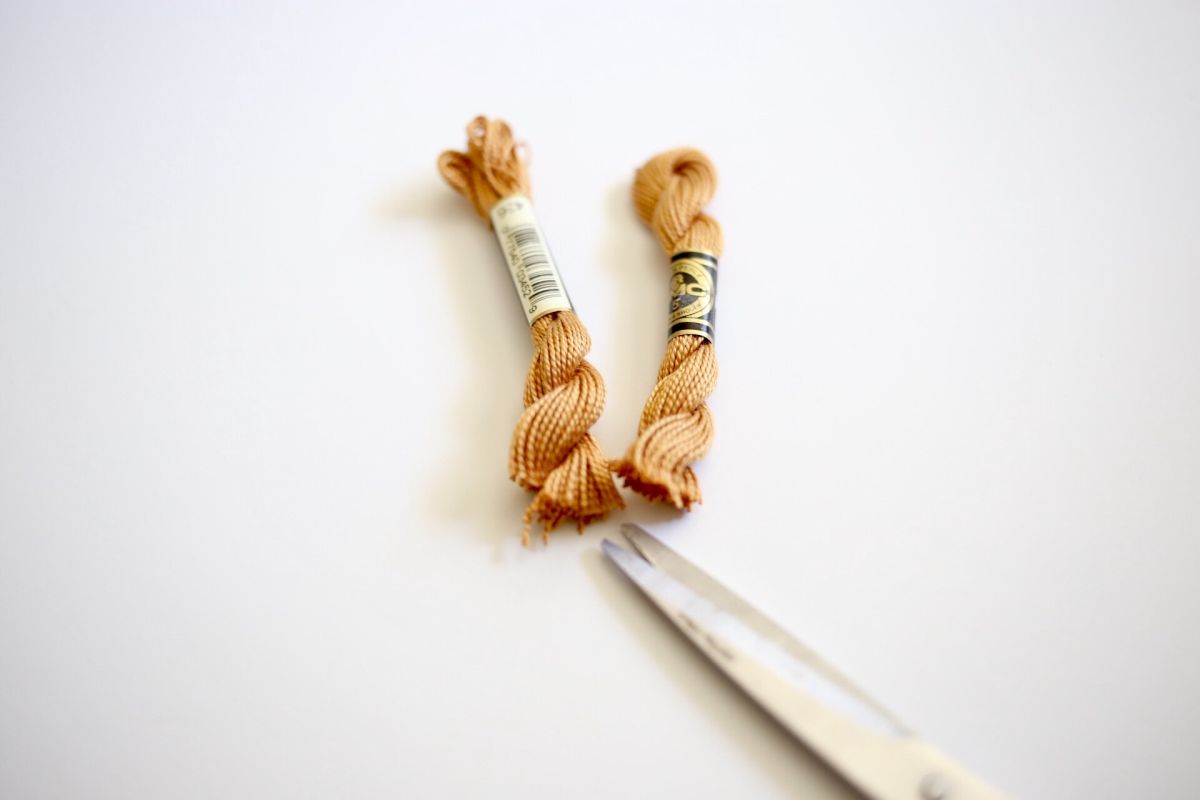
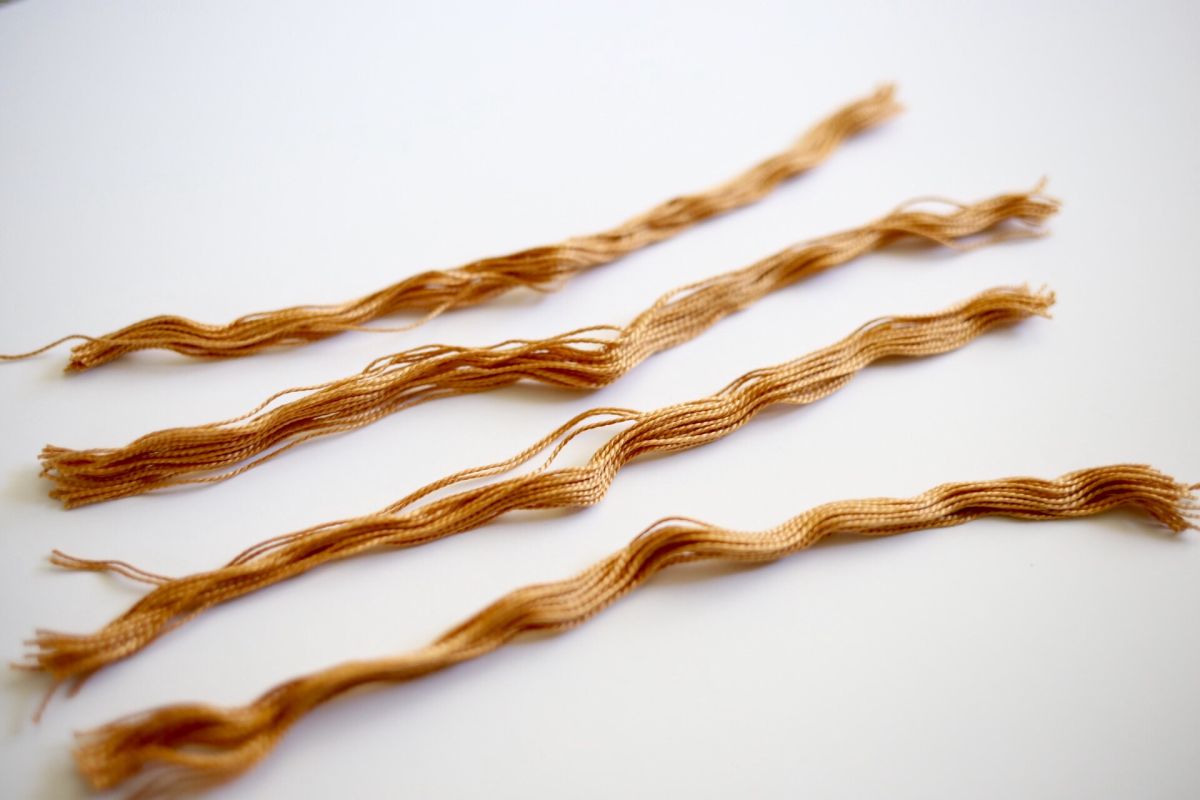
Step 4: cutting cotton fiber
Accept the Pearl cotton wool thread and cut in right in the center and divide the thread into 4 different bundles.
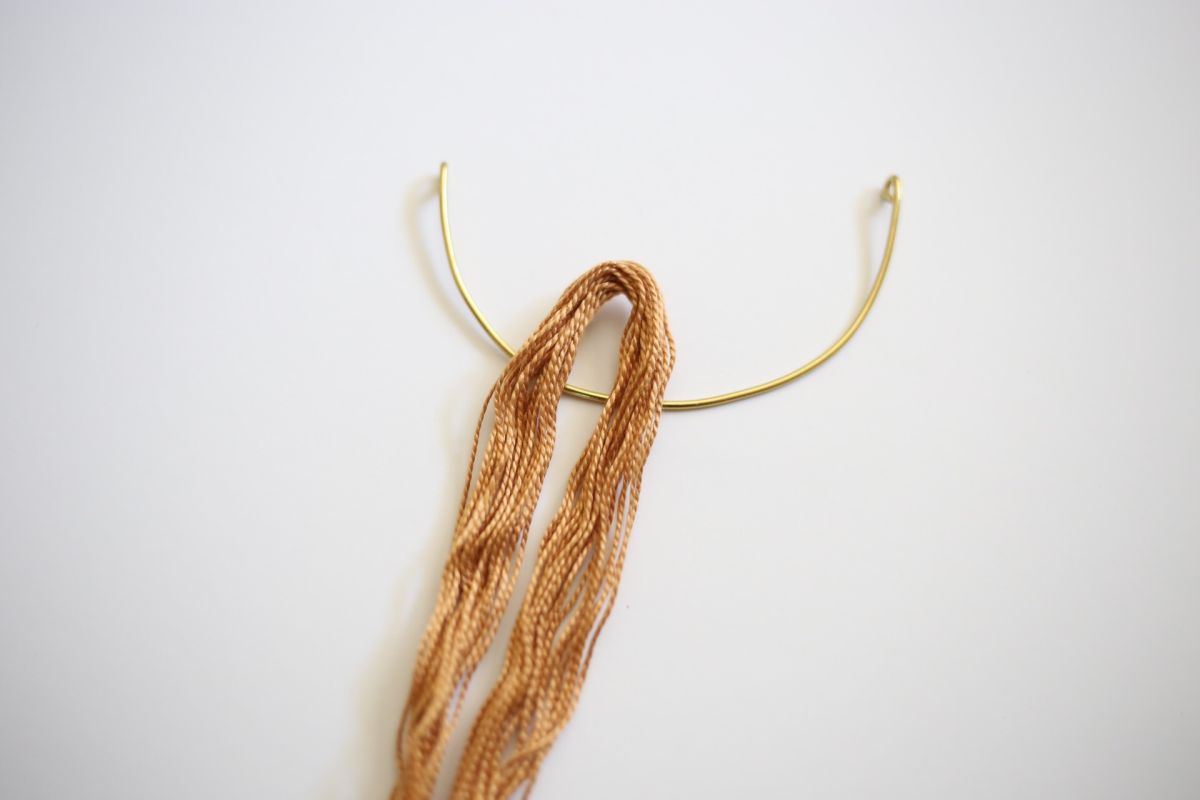
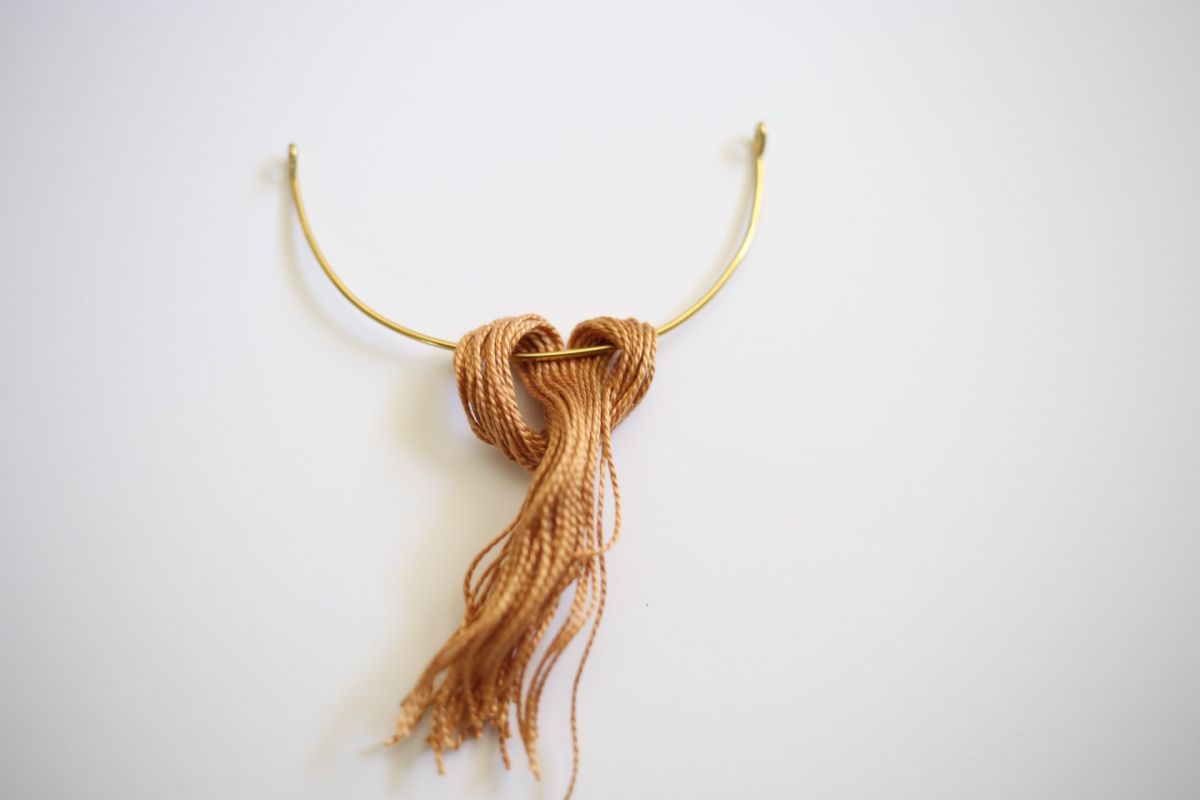
Pace 5: attaching thread
At present its time to adhere the thread onto the brass wire. Take a bundle of the thread and adhere it to the brass by doing a larks knot- Fold the bundle of thread and identify it under the brass, the folded area should be a the lesser and the ends at the summit. Bring both ends over the brass, heading downwardly. Then laissez passer them nether the folded area and pull firmly.
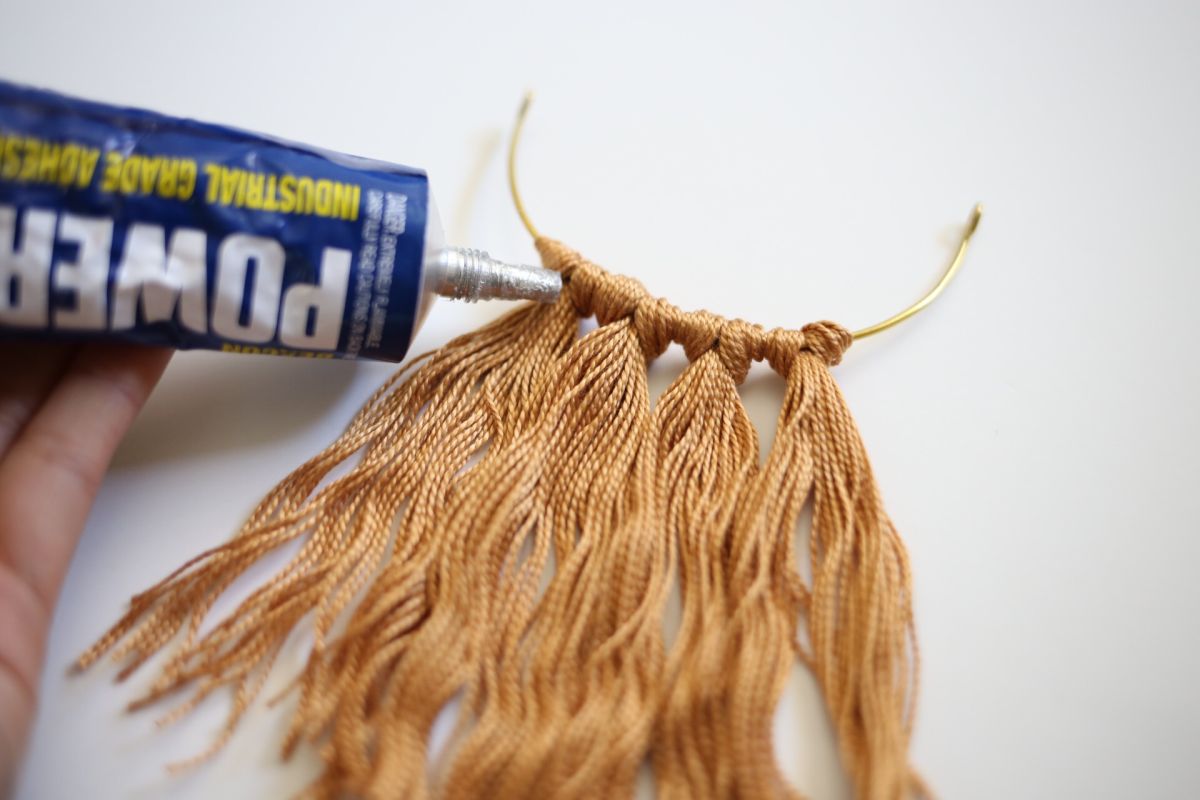
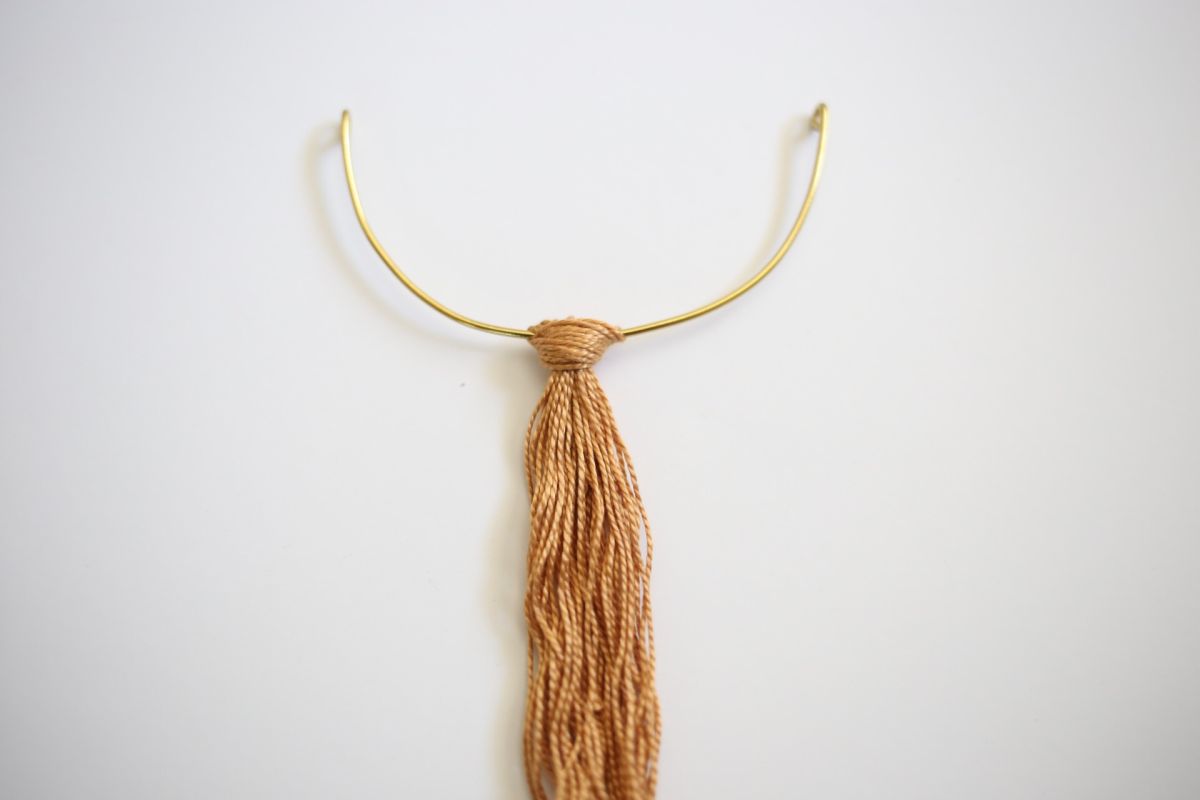
Footstep 6: add together glue onto knot
Attach all 4 bundles onto the brass using a larks knot. Once you lot take fastened all 4 pieces, take your mucilage or hot gum gun and drop a small amount of glue on the dorsum of the knot, in-between the thread. Doing this well ensure that the thread won't come loose.
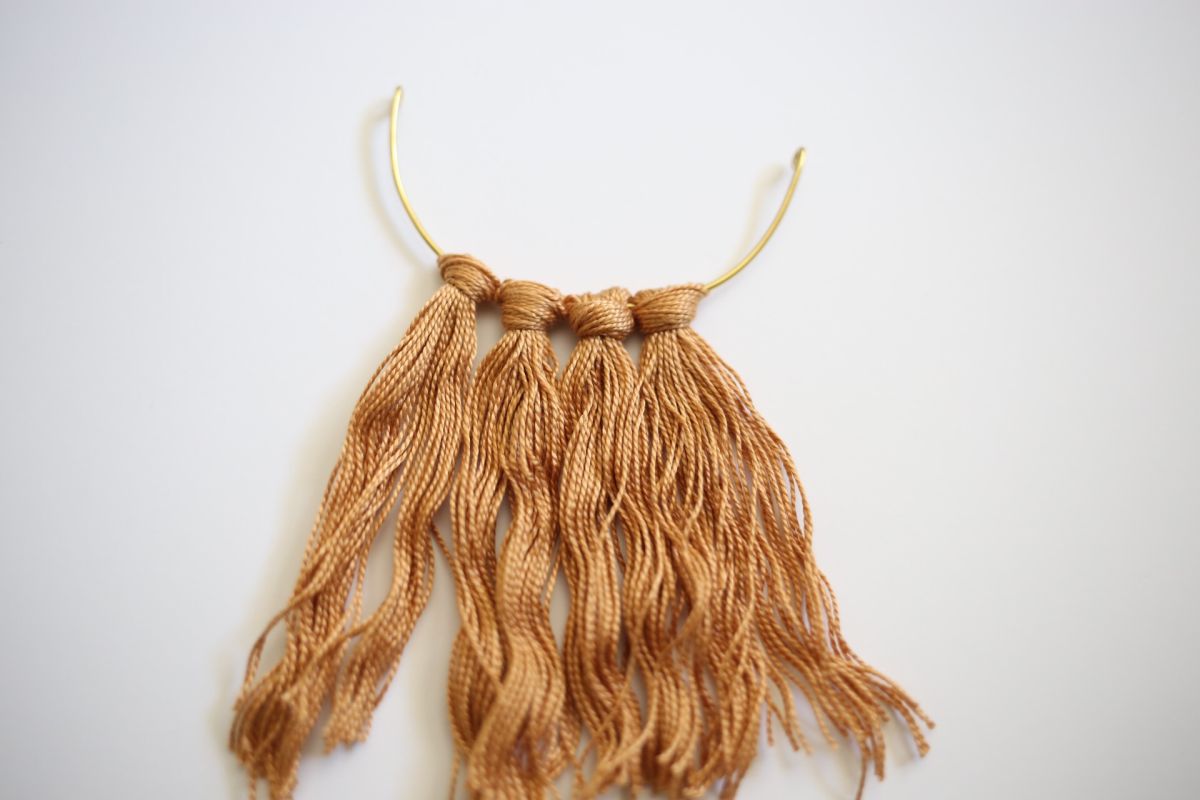
Step 7: trim ends
One time the glue has completely dried, trim the ends of the fringe with a pair of pair of scissors. You lot can make up one's mind how long of short you want the fringe to lay.
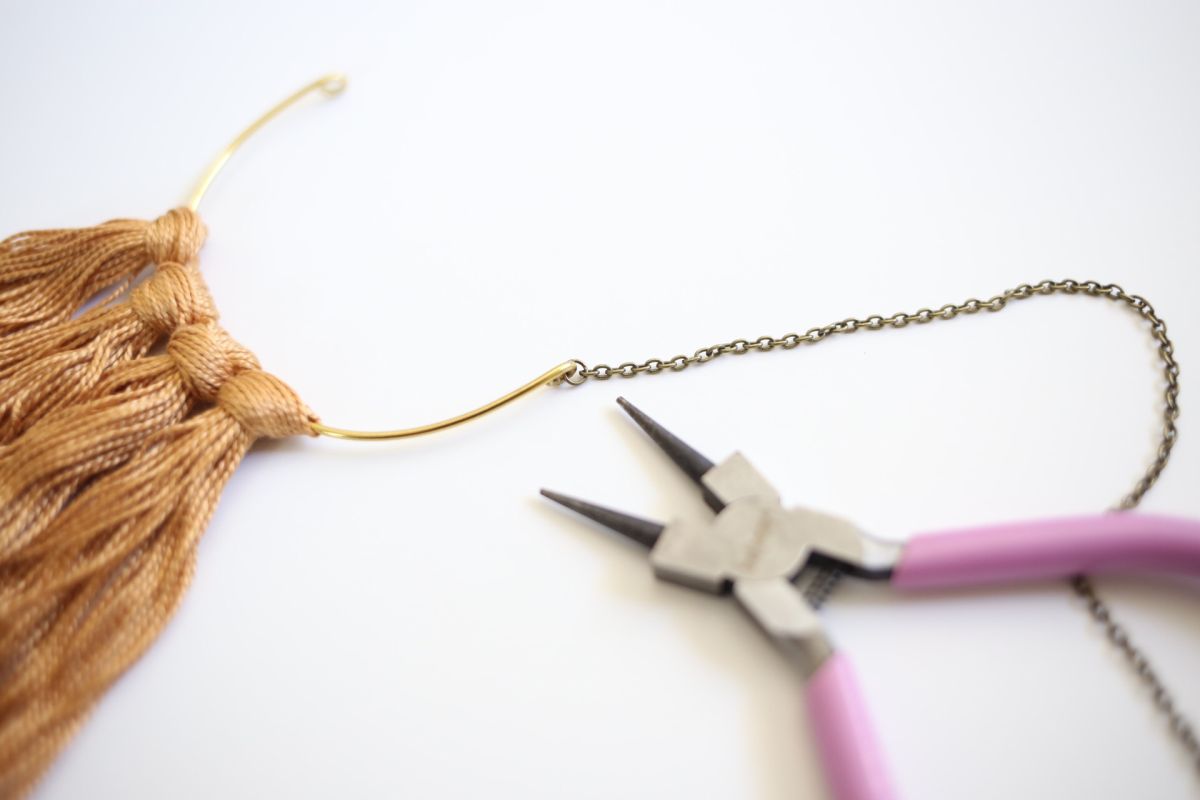
Step eight: attach fringe to the chain
Decide how long yous want the necklace to lay and cut 2 pieces of the chain. Now attach the brass fringe to the chain by connecting the ends with a jump ring, and employ the pliers to close the ring.

Stride 9: attach the squeeze
At the terminate of the concatenation adhere the jewelry clasp with a jump band, and then adhere the band on the other concatenation.
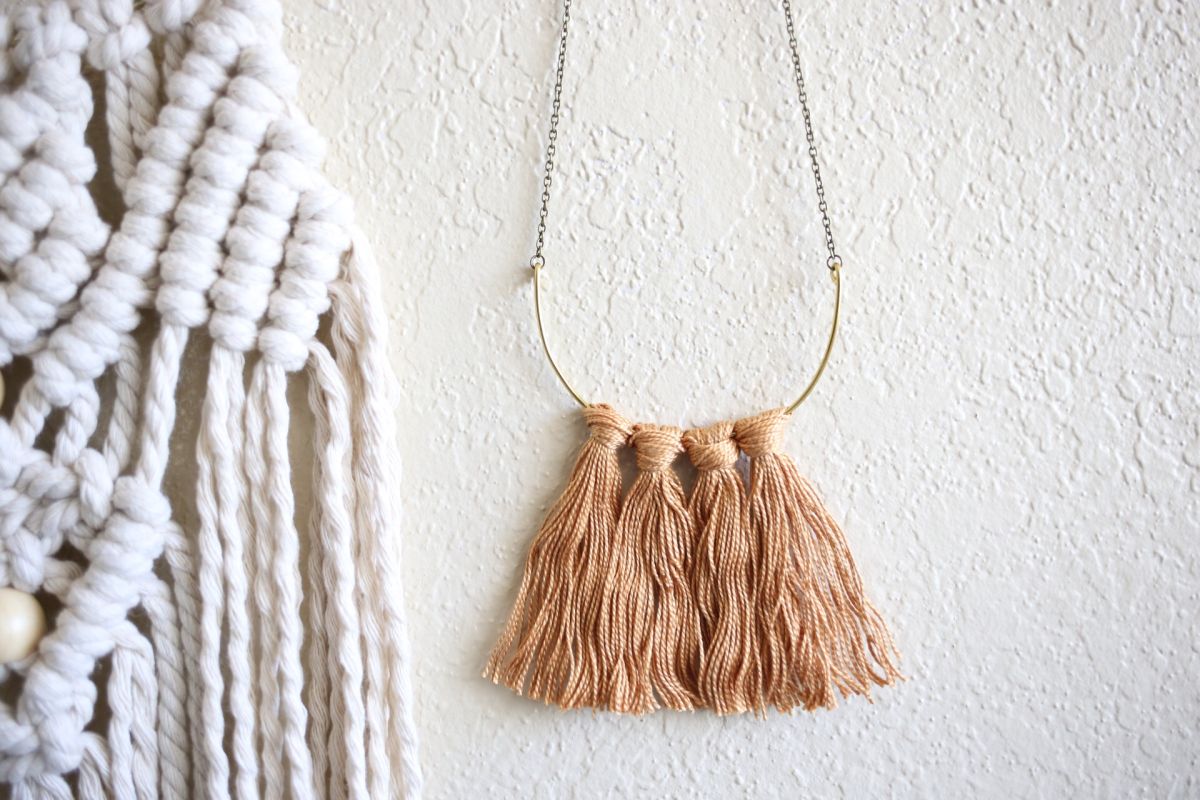
Enjoy your new fringe argument piece! Happy crafting!
Don't forget to share your project with us!
Source: https://www.diys.com/fringe-brass-necklace/
0 Response to "DIY Fringe Brass Necklace - Step By Step Craft Tutorial"
Post a Comment